What Affects the Cost of a Patio Project?
At JL Landscape, we've built and planned hundreds of patios across Connecticut. We've worked with homeowners on everything from simple concrete slabs to multi-level natural stone outdoor living spaces. That firsthand experience is what we draw on here. This guide is not a sales pitch. It is a straightforward breakdown of everything that affects what you will actually pay for a patio, so you can plan smart and avoid surprises.
A Quick Answer: What Actually Drives Patio Costs?
Patio prices vary widely, but the biggest cost drivers come down to four things: size, materials, site conditions, and labor complexity. Most homeowners in the Northeast pay between $15 and $50 per square foot for a professionally installed patio, depending on those factors. A basic 200-square-foot concrete paver patio might run around $4,000. A 600-square-foot natural stone patio with a seating wall and steps could easily reach $30,000 or more.
The honest answer is that there is no one-size-fits-all price. But by the end of this guide, you will know exactly what questions to ask and what line items to expect in any quote.
Why Homeowners Trust Our Insight on Patio Planning
Our team has handled patio projects ranging from tight suburban backyards to large open properties with complex grading challenges. We have installed pavers, bluestone, travertine, natural stone, and concrete. We have dealt with bad soil, tight access, high water tables, and local permit requirements throughout Connecticut.
That range of experience means we are not guessing when we talk about cost. We have priced these jobs. We have seen where budgets get stretched, and we have seen where homeowners save money without sacrificing quality. You can read what our past clients have to say on our reviews page. Everything in this guide comes from that real-world work.
The Biggest Factors That Impact Patio Cost
Patio Size and Layout
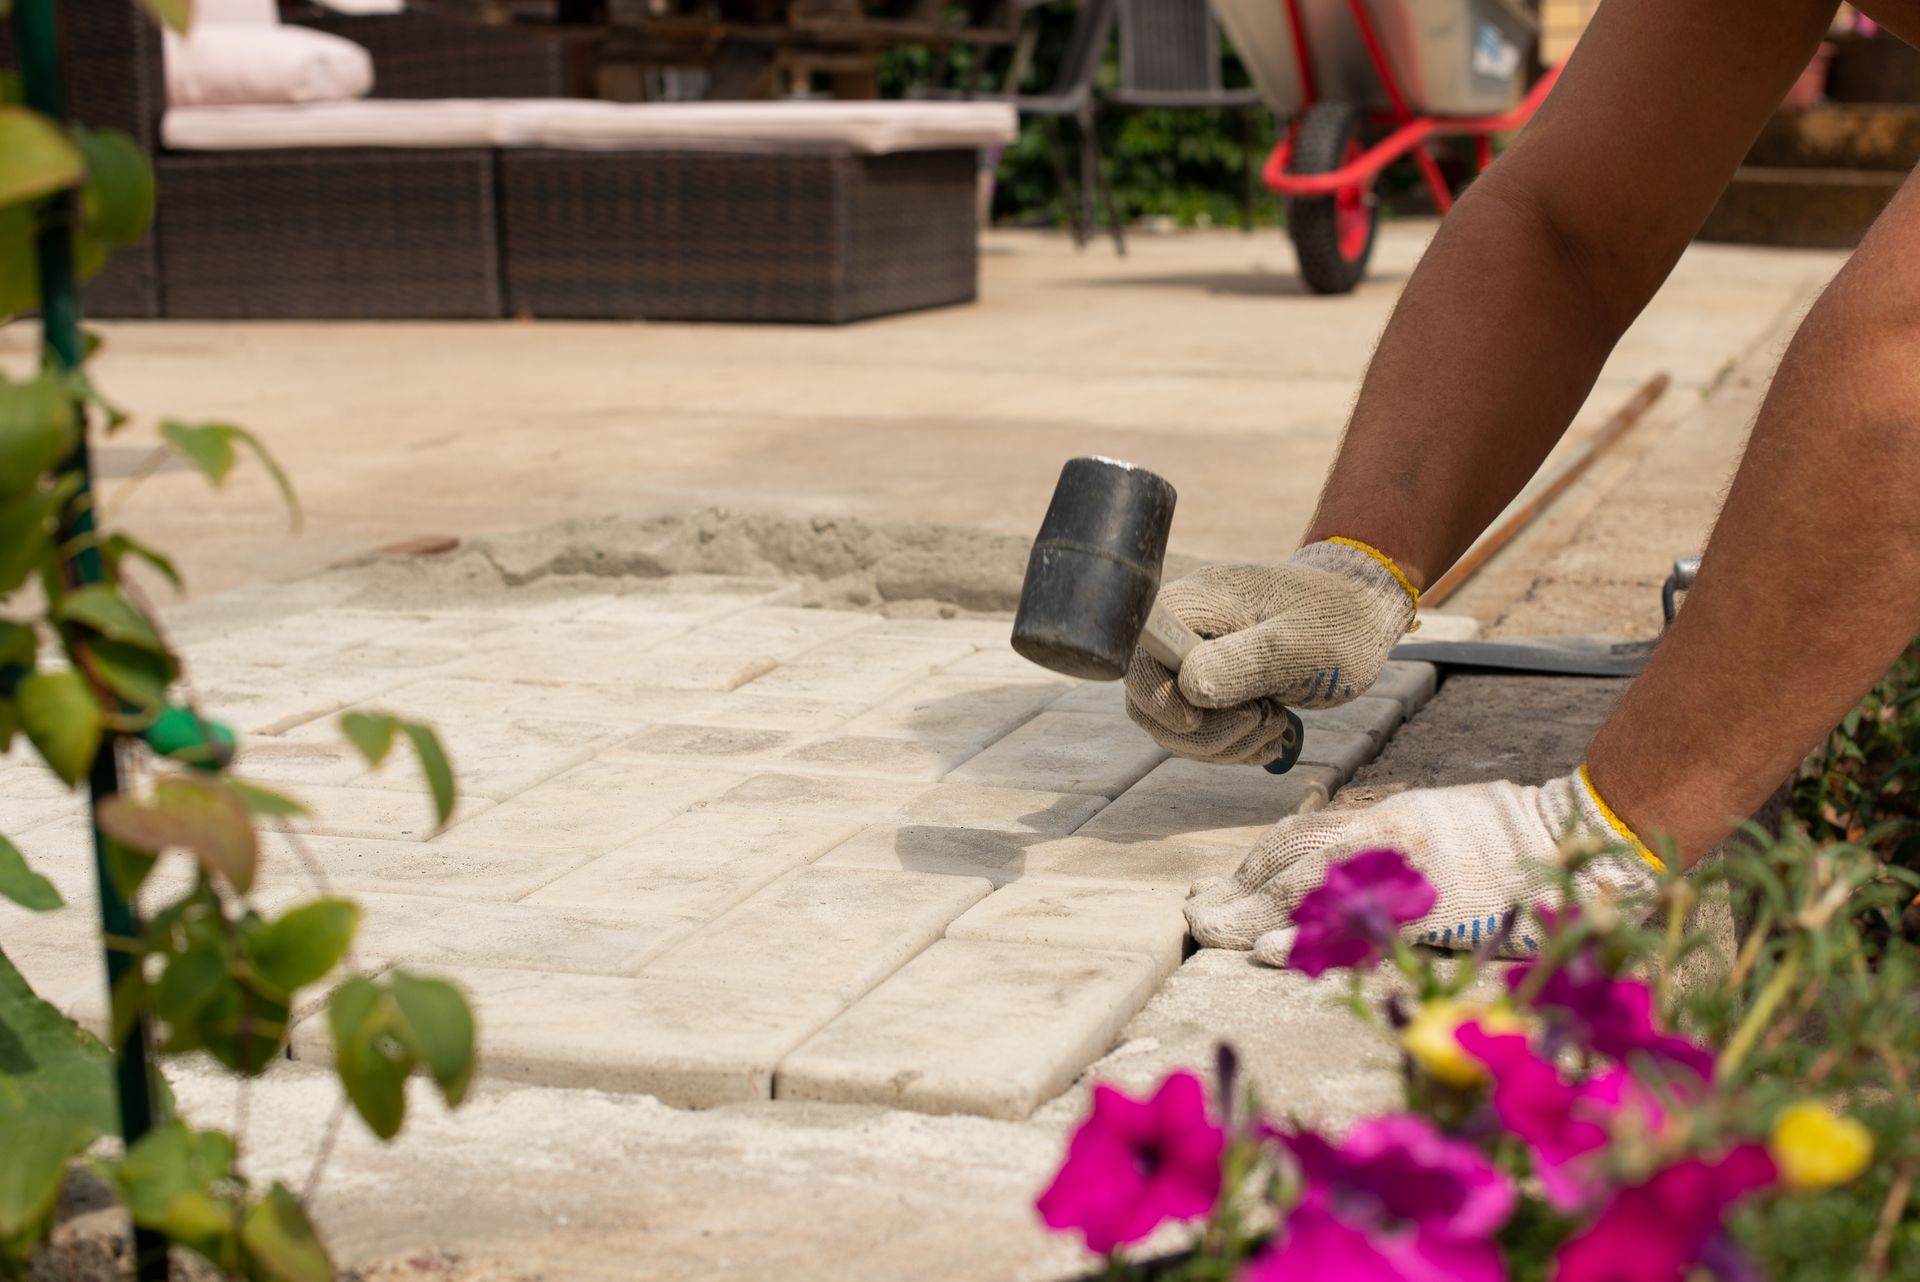
The most obvious factor is square footage. More space means more materials and more labor hours. But size alone does not tell the whole story. A rectangular 400-square-foot patio is faster and cheaper to install than a 400-square-foot patio with curved edges, multiple angles, or a custom pattern.
Complex layouts require more cuts, more precise fitting, and more time. A simple running bond or grid pattern is the most cost-effective. Herringbone, diagonal, and intricate custom patterns add 15 to 25 percent or more to labor costs because of the additional cutting and fitting involved.
Multi-level patios, terraced designs, and elevated decks built with patio materials add even more. Each level change requires additional structural support, steps, and potentially retaining walls.
Material Selection
Material choice is often the single biggest cost variable in a patio project. Here is a general cost comparison:
- Concrete pavers are the most popular option for a reason. They are durable, widely available, and come in many colors and styles. Installed costs typically range from $15 to $25 per square foot.
- Bluestone is a premium natural material common in the Northeast. It has a clean, classic look and holds up well in cold climates. Expect to pay $25 to $40 per square foot installed, depending on thickness and pattern.
- Travertine brings a warmer, Mediterranean aesthetic. It is porous and requires sealing in colder climates. Installed prices typically fall between $20 and $35 per square foot.
- Natural stone (flagstone, granite, limestone) sits at the high end. Irregular shapes require skilled labor to fit. Total installed cost often runs from $30 to $55 per square foot or more, depending on the stone and complexity.
Beyond upfront cost, it is worth thinking about long-term value. A cheaper material that fades, cracks, or heaves after a few winters will cost more in the long run than a premium material installed correctly.
Site Preparation and Ground Conditions
This is the area where projects most often go over budget, and it is the one homeowners are least likely to think about upfront.
Before any patio material goes down, the ground has to be properly prepared. That means excavating to the right depth, removing existing grass, soil, or old hardscape, grading for drainage, and compacting a stable base. On a flat, accessible lot with good soil, this is straightforward. On a sloped lot, a tight side yard, or a property with clay-heavy or rocky soil, it gets more complicated fast.
Excavation adds cost based on how deep you need to go, what equipment is needed, and where the removed material goes. Rocky soil requires jackhammering or specialty equipment. Soft or unstable soil may require additional base depth or compaction work.
If the installation crew has to bring equipment through a gate, across a garden, or around obstacles, that adds time and therefore cost. Always mention site access when getting quotes.
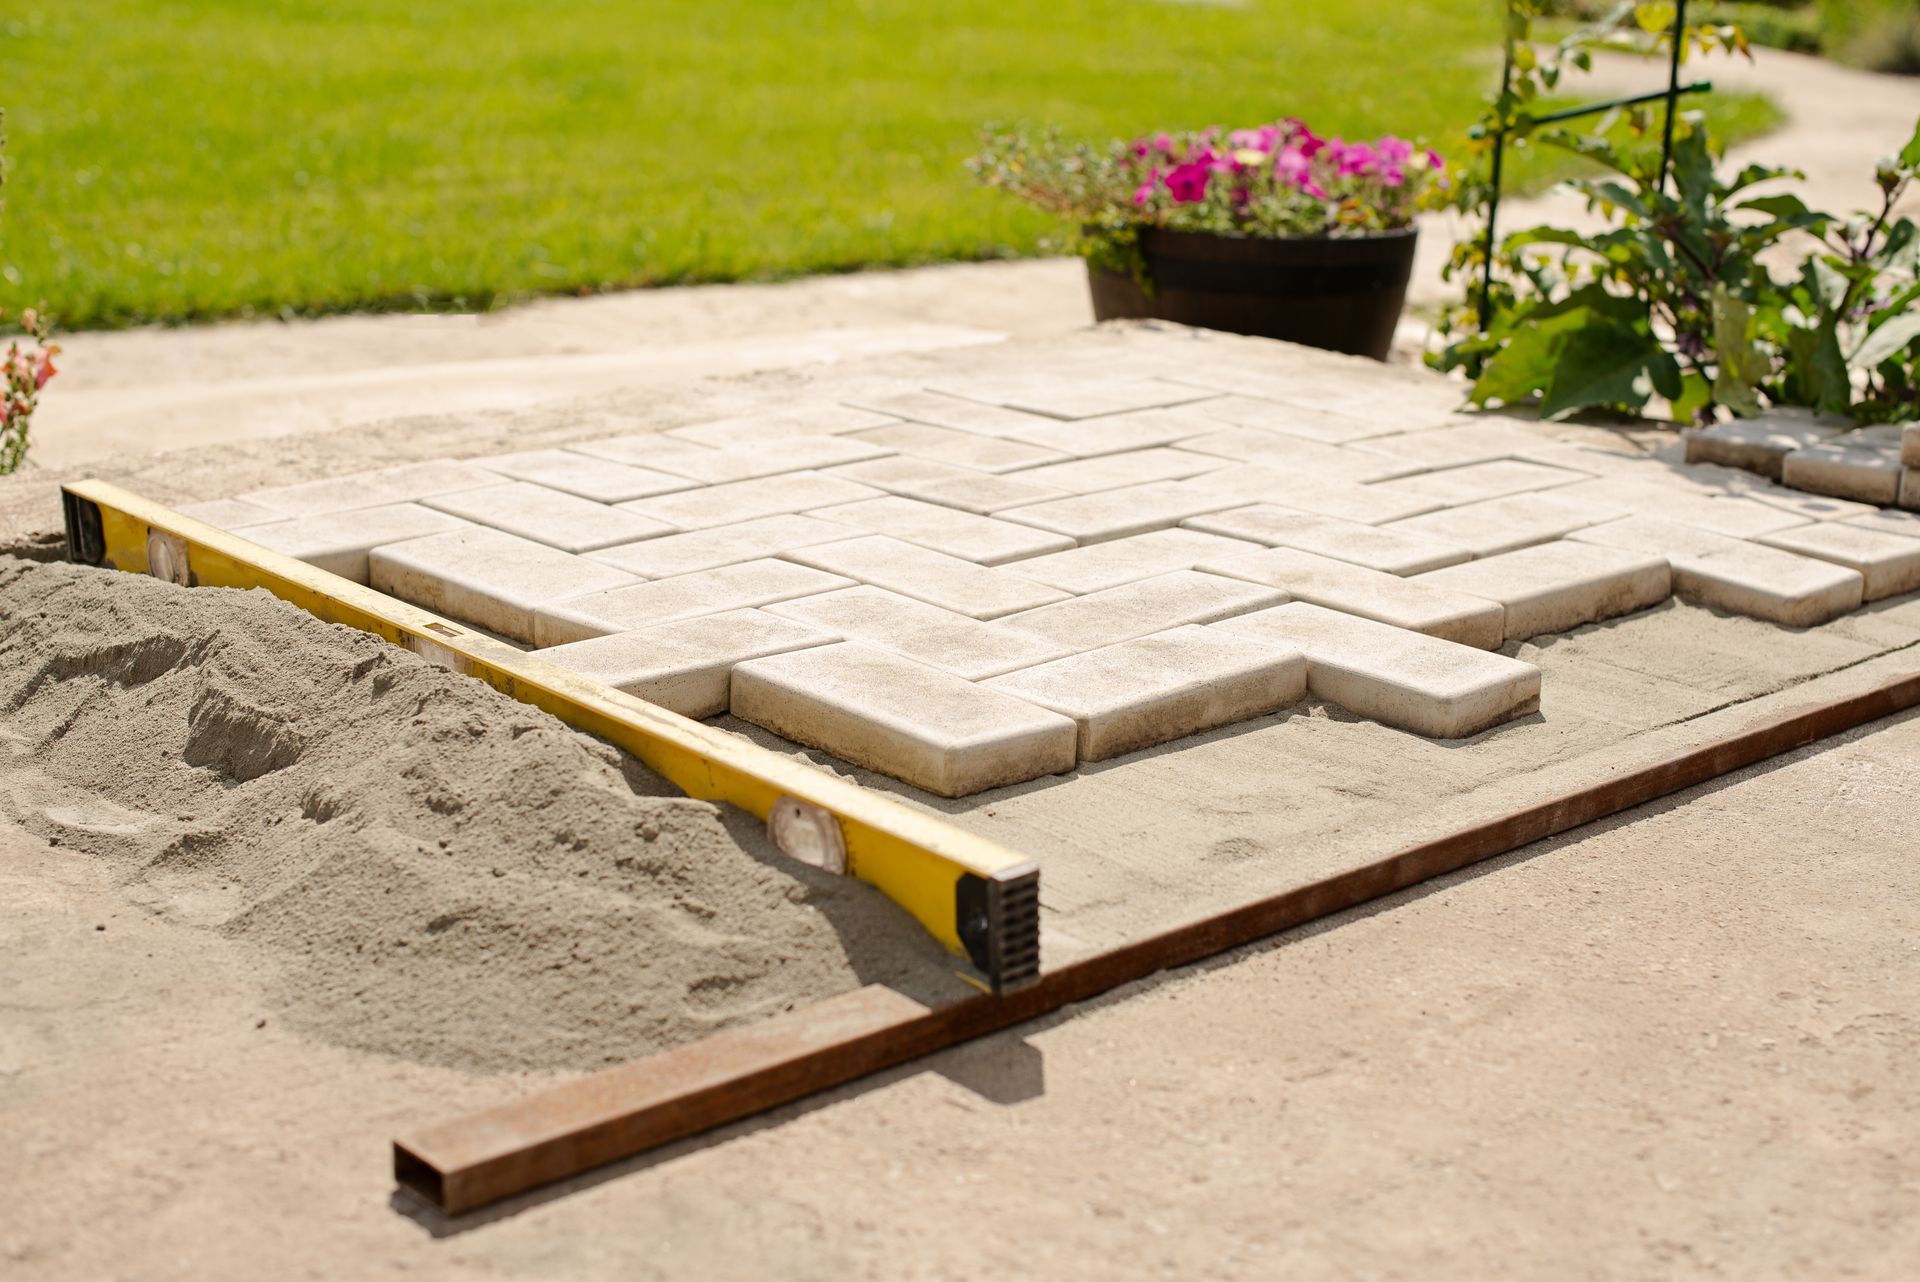
Base Installation and Foundation Work
A patio is only as good as what is underneath it. This is not something you can see once the project is done, but it determines whether your patio stays level and solid for 20 years or starts heaving and settling after the first few winters.
A proper base typically includes a compacted gravel layer of four to six inches (or more in freeze-thaw climates like Connecticut), followed by a layer of coarse sand. This base provides drainage and stability. Skimping on base depth or compaction is one of the most common shortcuts that leads to costly repairs down the road.
In areas with poor drainage or high water tables, additional drainage infrastructure may be needed before the base is even installed. This adds cost but protects your investment.
Labor and Installation Complexity
Labor is typically 40 to 60 percent of the total project cost. That percentage shifts based on how complex the work is.
Skilled installers who specialize in natural stone or intricate paver patterns charge more than general landscapers who occasionally lay pavers. For premium materials and complex designs, the extra cost for experienced craftspeople is almost always worth it. Poor installation of expensive materials is a painful outcome.
Other labor cost factors include: number of workers needed, how far materials have to be moved on-site, and whether the project requires any special equipment like a plate compactor, wet saw, or mini excavator.
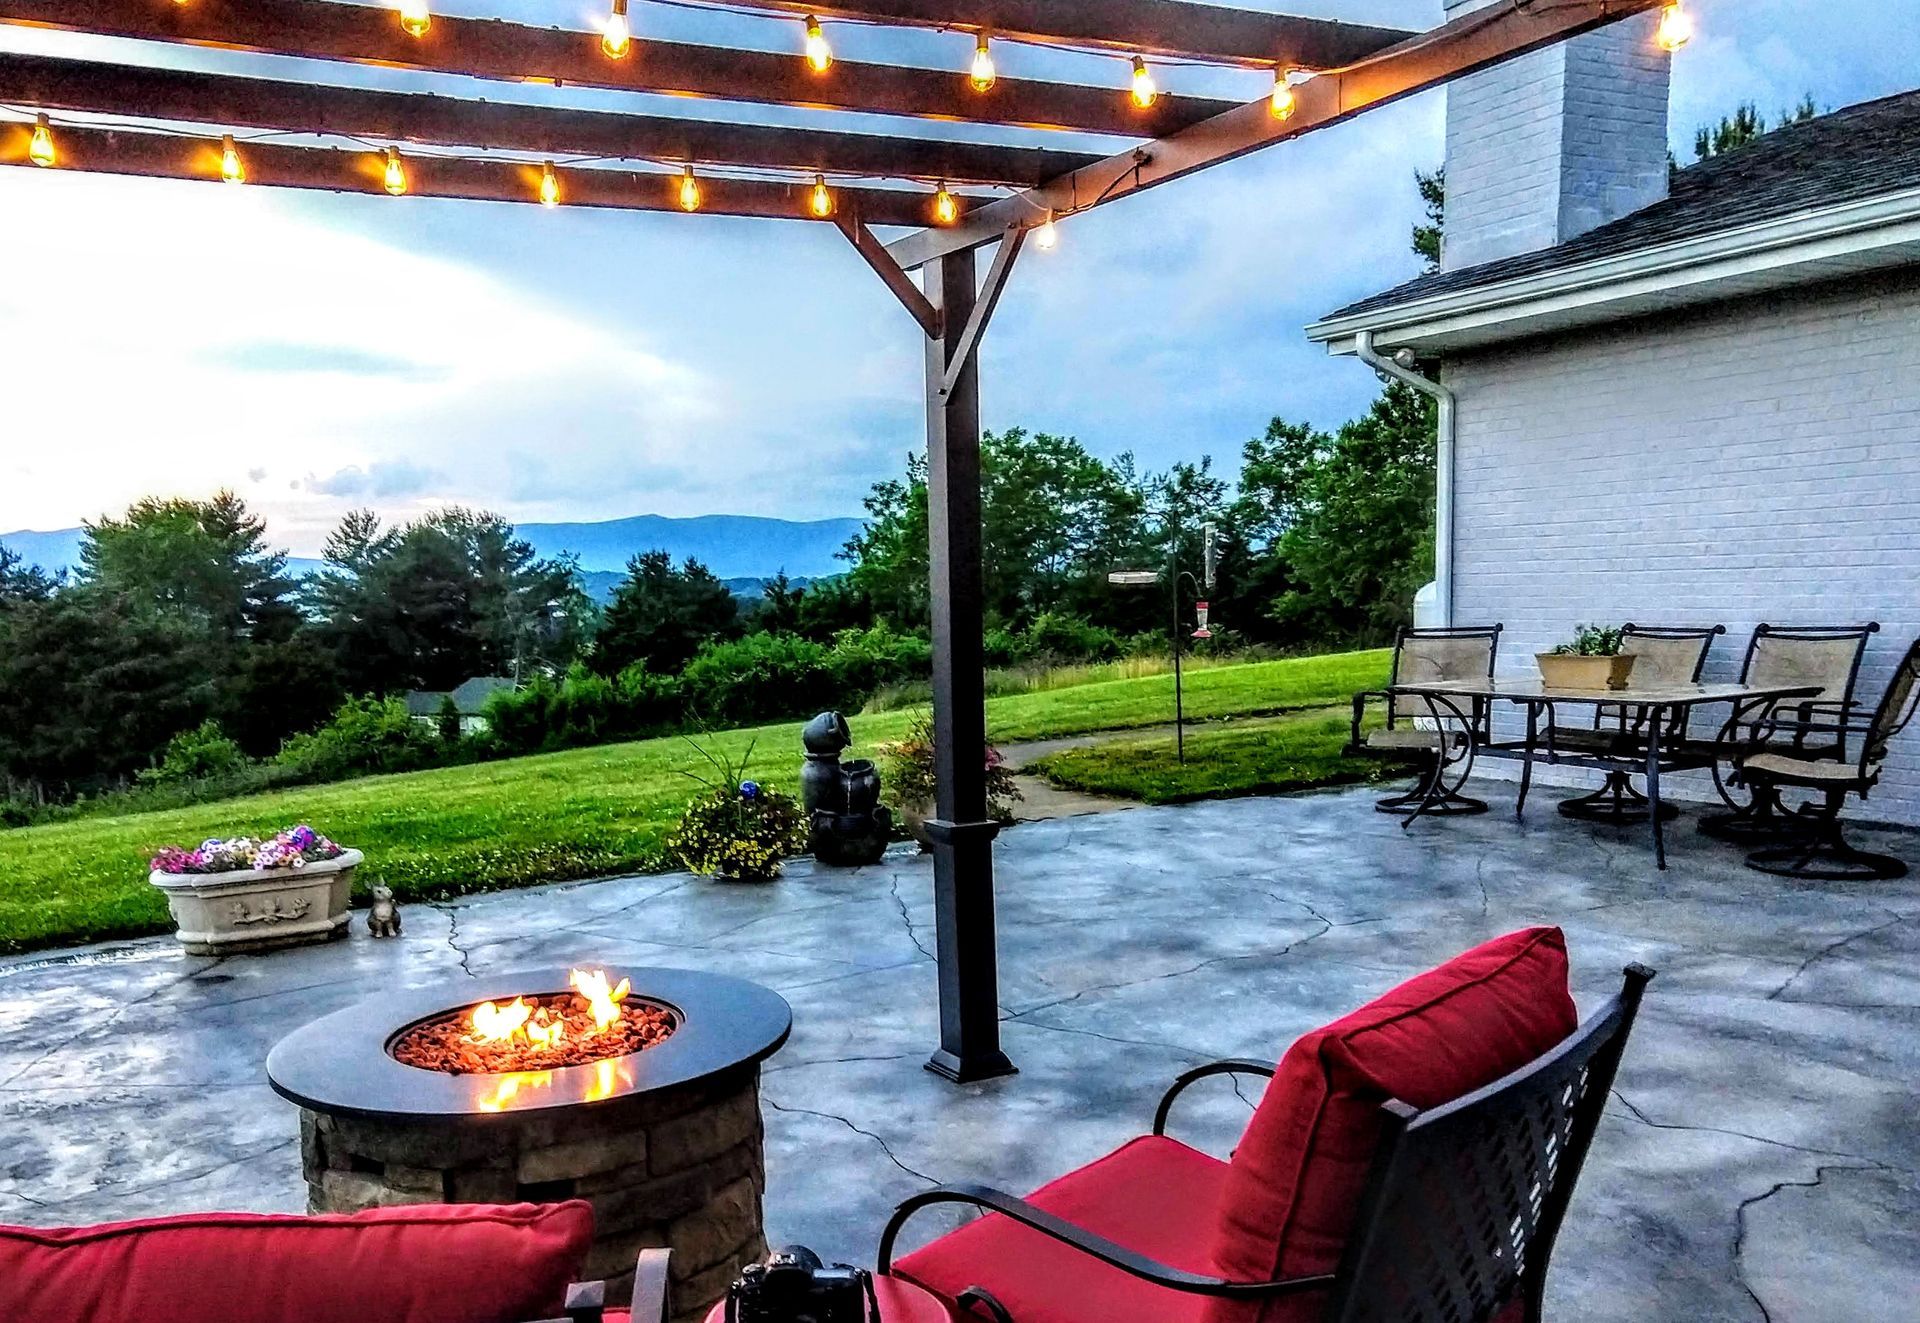
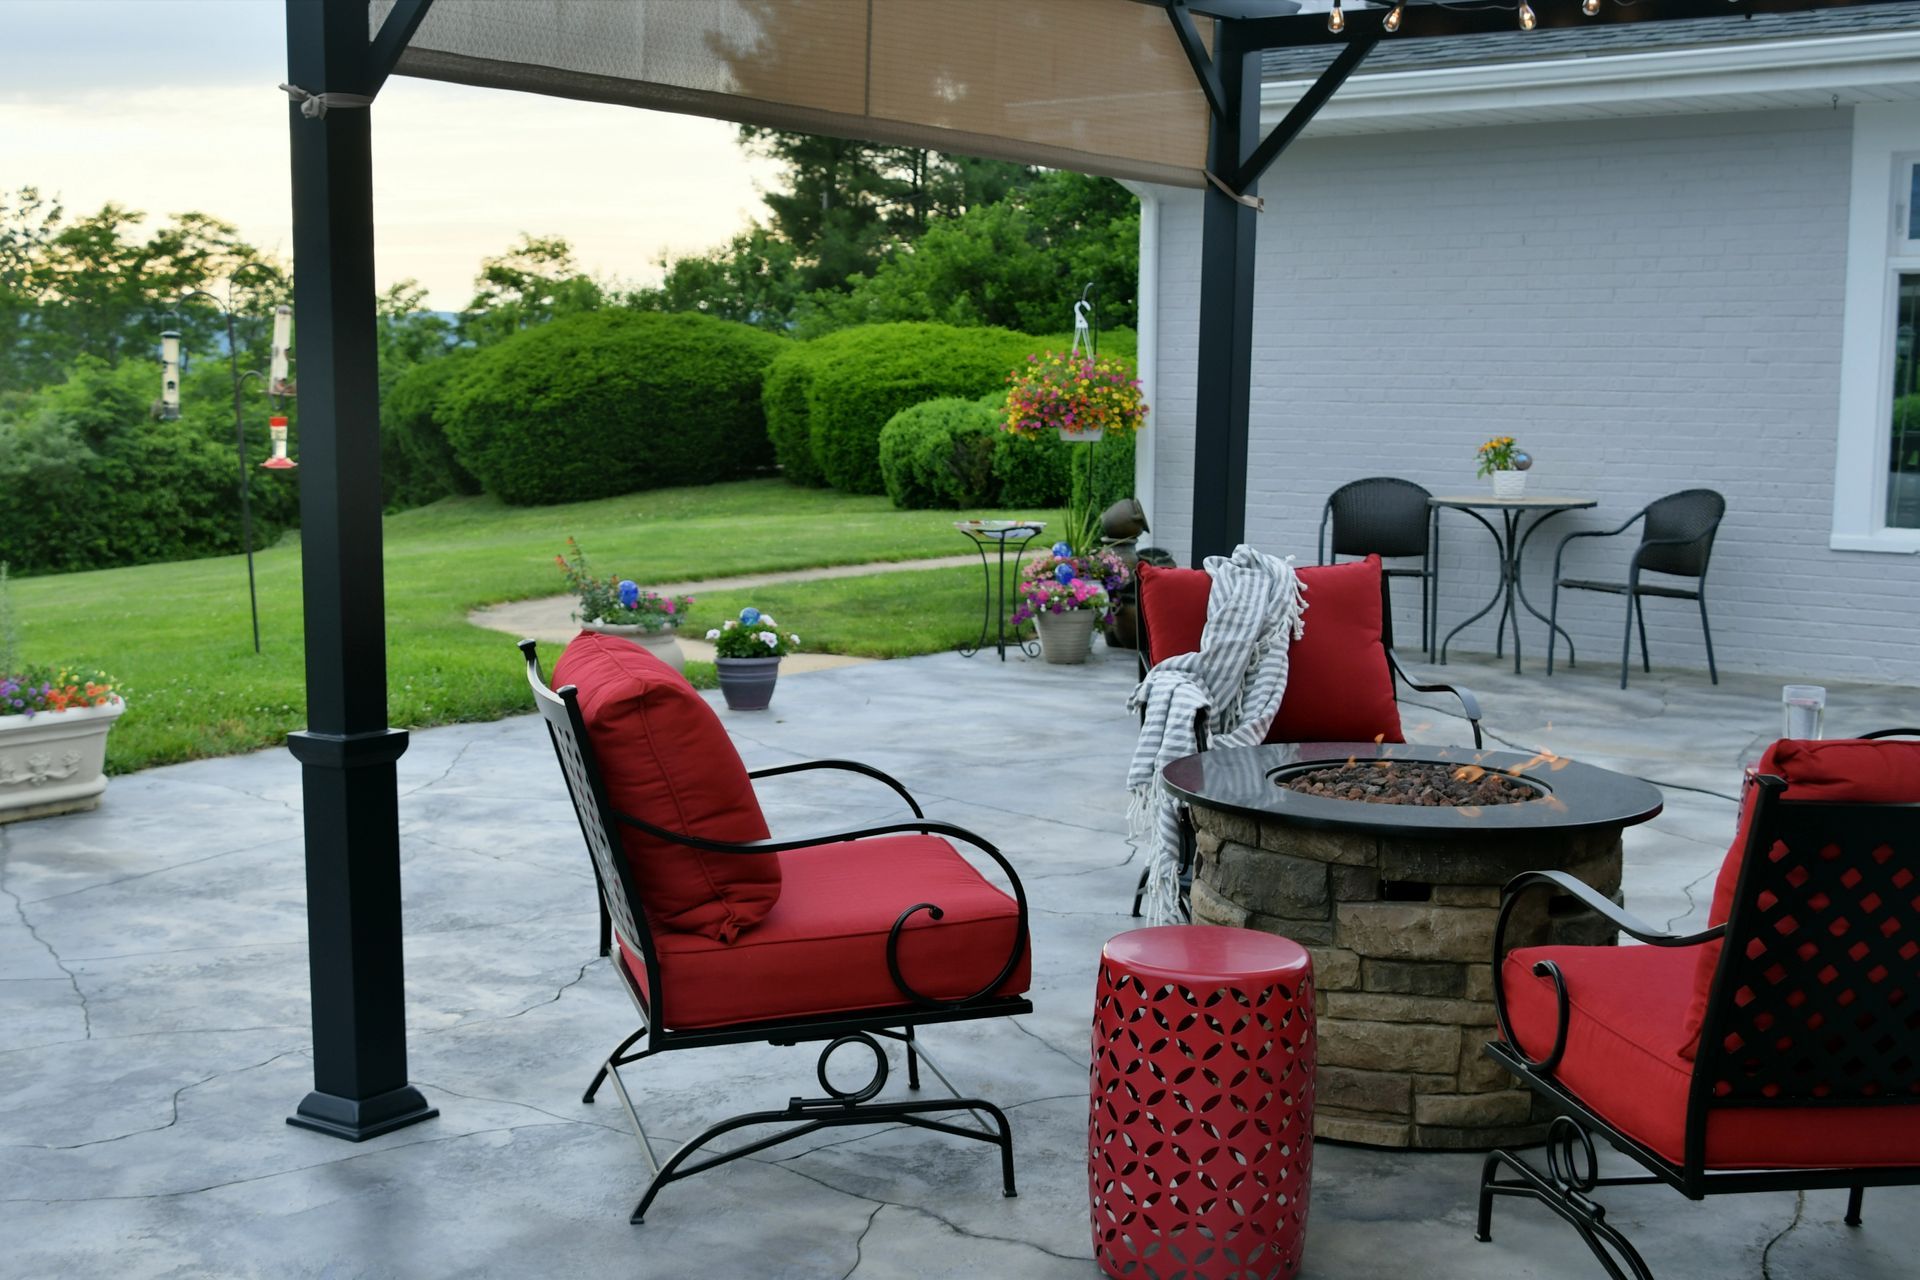
Design Features and Add-Ons
The features you add around and into a patio can easily double the base cost of the project. Common add-ons and their approximate cost ranges:
- Retaining walls and seating walls: $50 to $100+ per linear foot, depending on height and material.
- Steps: $150 to $500 per step, depending on material and whether they are freestanding or integrated.
- Fire pit: $1,500 to $8,000, depending on whether it is a simple ring or a built-in gas fire feature.
- Outdoor kitchen or grill station: $3,000 to $20,000+ for a fully built structure with counters, appliances, and utilities.
- Lighting: $500 to $3,000 or more for integrated low-voltage path and step lighting.
- Pergola or shade structure: $3,000 to $15,000+, depending on size and materials.
Each of these adds real value to the space. But they should be planned into the budget from the start, not added as afterthoughts.
Permits, Codes, and Local Requirements
Not every patio requires a permit, but some do. In Connecticut, a patio at grade (meaning it sits at ground level with no raised structure) often does not require a permit. But elevated patios, projects near wetlands or setback lines, and anything involving structural elements like walls over a certain height typically do.
Permit costs vary by town but are usually between $100 and $500 for a residential patio. The bigger cost is the time involved in the permitting process, which can add several weeks to a project timeline.
Always ask your contractor whether a permit is required for your specific project and location. Skipping a required permit can create problems when you go to sell your home.
Hidden Costs Homeowners Don't Always Consider
Drainage and Water Management
Poor drainage causes more patio failures than bad materials or poor installation. If water pools on or around your patio, it will damage the base, shift the material, and create ice hazards in winter.
Proper slope, drainage channels, or dry wells add cost upfront but prevent expensive repairs later. In some cases, regrading the surrounding yard or installing a French drain is necessary before the patio project even begins.
Demolition or Removal of Existing Structures
If you have an existing concrete patio, wooden deck, or hardscape that needs to come out first, that is a separate line item. Concrete removal runs $2 to $6 per square foot depending on thickness. Disposal fees for the debris add to that.
Accessibility and Equipment Needs
If heavy equipment cannot reach the work area, everything has to be done by hand or with smaller tools. That takes longer and costs more. Narrow side yards, fences, stairs, and indoor-only access routes all affect labor cost.
Repairs and Long-Term Maintenance
All patios require some maintenance over time. Pavers may need re-sanding or re-leveling. Natural stone should be sealed every few years. Understanding the long-term cost of your material choice is part of making a smart investment.
Cost Differences by Patio Material
If you are still weighing your options, our guide on
pavers vs. bluestone vs. travertine goes deeper on how each material performs, looks, and holds up over time. Here is a cost-focused summary:
| Material | Installed Cost (per sq ft) | Estimated Lifespan | Maintenance Level | CT Climate Suitability |
|---|---|---|---|---|
| Concrete Pavers | $15 – $25 | 25 – 50 years | Low | Excellent |
| Travertine | $20 – $35 | 20 – 40 years | Medium (sealing required) | Fair – needs proper sealing |
| Bluestone | $25 – $40 | 30 – 50+ years | Low | Excellent |
| Natural Stone | $30 – $55+ | 30 – 50+ years | Medium | Excellent |
How Patio Design Choices Influence Your Budget
Shape is one of the most underestimated budget factors. A simple rectangle is the most efficient shape to build. Curves, angles, and irregular borders all require additional cutting and fitting.
Elevation changes, like a patio that steps down to a lawn or up to a deck, add structural work and materials. Multi-level designs are popular and beautiful, but they come with a real price premium.
Integrating the patio into the surrounding landscape, such as building it around existing trees, planting beds, or water features, also adds complexity and cost. The more custom the design, the more you should expect to pay. You can browse real examples of our completed projects in our portfolio to get a sense of what different design choices look like in practice.
DIY vs Professional Patio Installation Costs
A DIY paver patio can save 40 to 50 percent on labor costs. For a motivated homeowner with the right tools and enough time, a simple rectangular patio on a flat lot is a realistic DIY project.
The risks are real, though. Improper base preparation is the most common DIY mistake, and it leads to settling, heaving, and drainage problems that cost more to repair than the original savings. Rental equipment, material waste from mistakes, and the sheer physical labor involved should all factor into the decision.
For premium materials like natural stone or bluestone, professional installation is almost always worth the extra cost. The material itself is expensive, and the skill required to work with it correctly takes years to develop.
How to Plan a Patio Project Budget the Right Way
- Define your must-haves first. Know your target square footage, your preferred material, and any features that are non-negotiable before you talk to a single contractor.
- Get at least three itemized quotes. Ask each contractor to break out labor, materials, base preparation, and extras separately. Total price alone does not tell you what you are actually getting.
- Build in a 10 to 15 percent contingency. Unexpected site conditions, material price shifts, and design changes happen. A budget cushion prevents difficult decisions mid-project.
- Spend where it matters most. Base preparation and drainage are invisible once the project is done, but they determine how long your patio lasts. That is not where you want to save money.
When Is the Best Time to Build a Patio for Cost Savings?
Late fall and early winter are typically slower periods for patio contractors in Connecticut. Some contractors offer discounts for off-season scheduling, since they prefer to keep crews busy rather than idle. Planning your project for November through February can sometimes save 10 to 15 percent.
The tradeoff is that cold temperatures affect certain installation processes, particularly anything involving mortar or concrete. A reputable contractor will tell you honestly whether conditions are suitable for your chosen material.
Booking early in the year, before the spring rush, is another strategy. Contractors who are already booked through the busy season have less incentive to negotiate. Booking in January or February for a May or June installation often gets better pricing and scheduling priority.
Final Thoughts: Balancing Cost, Quality, and Longevity
A patio is a long-term investment in your home and in your quality of life. The homeowners who are happiest with their patios five and ten years later are the ones who spent the money upfront on proper site preparation, quality materials, and skilled installation, not the ones who chased the lowest bid.
That does not mean you need to spend the maximum budget. It means understanding what each dollar buys, knowing where quality matters most, and making informed decisions. Use this guide as a reference when you are getting quotes, planning your design, and setting your budget. The more you understand going in, the better your outcome will be.
Frequently Asked Questions
How long does a patio installation typically take?
Most residential patios take between two and five days to install once work begins. That window depends on size, material, and site conditions. A simple 300-square-foot paver patio on a flat lot with good access is often done in two to three days. A larger project with natural stone, retaining walls, or difficult site access can stretch to a full week or more. Keep in mind that base preparation and curing time factor into that, not just the laying of material.
Do I need to be home during the installation?
You do not need to be home for every hour of the project. However, it is a good idea to be present on the first day so you can walk the site with the crew, confirm layout dimensions, and answer any questions before work gets underway. Being reachable by phone throughout the project is enough for most homeowners.
Will a patio increase my home's resale value?
Generally, yes. A well-built patio adds usable square footage to your outdoor living space, which is a consistent selling point in the Connecticut market. Return on investment varies, but industry estimates typically put it between 50 and 80 percent of the project cost at resale. The quality of the materials and installation matters a lot here. A patio that is heaving, cracked, or poorly drained can actually hurt a sale rather than help it.
How do I know if my patio quote is reasonable?
Get at least three itemized quotes and compare them line by line, not just by total. Look at what each contractor includes for base preparation, since that is where cheaper quotes often cut corners. A significantly lower bid usually means something is being skipped, whether that is base depth, proper compaction, drainage planning, or permitting. Price should be one factor in your decision, but the contractor's experience with your chosen material and their references matter just as much.
Can an existing patio be rebuilt or resurfaced instead of fully replaced?
Sometimes. If the base beneath your existing patio is still stable and level, resurfacing or overlaying with a new material is an option. But if the base has shifted, settled, or failed, the only lasting fix is a full tear-out and rebuild. Putting new material over a bad base just delays the problem. A qualified contractor can assess this quickly during an on-site visit.
Have questions about your specific project?
Contact our team for a no-pressure consultation. We are happy to walk through your site and give you a realistic picture of what your project will cost.
Recent Posts