Retaining Wall Drainage: What Homeowners Need to Know Before Building
After years of building, inspecting, and repairing retaining walls across residential properties, we have seen the same truth play out again and again: drainage is what keeps a wall standing. We have walked job sites where beautiful walls were leaning, cracking, or pushing forward, and almost every time, the problem traced back to water that had nowhere to go. Drainage is not a small detail or an upgrade. It is the system that protects everything you build on top of it. This guide shares what we have learned in the field so you can plan, build, or hire out a retaining wall with confidence.
Why Drainage Matters Behind a Retaining Wall
A retaining wall holds back soil. Soil holds water. When water builds up behind the wall and cannot escape, it pushes hard against the structure. That pressure is what causes most retaining walls to fail. A well-built retaining wall drainage system gives water a clear path out, so the wall only has to hold back soil and not gallons of trapped water.
Good drainage is not optional. It is the foundation of a wall that lasts for decades.
How Water Pressure Causes Retaining Wall Failure
Water sitting behind a wall creates hydrostatic pressure. This is the force water puts on anything it cannot pass through. As more water collects, the pressure grows. A 4-foot wall with saturated soil behind it can face thousands of pounds of force.
That pressure does not just sit there. It pushes the wall forward. Over time, you start to see leaning, bowing, cracks, or full collapse. We have seen walls only a few years old come apart because no one planned for water behind them.
Why Drainage Should Be Planned Before Construction Starts
Drainage cannot be added later. Once a wall is built and backfilled, fixing the drainage means tearing it down. The gravel, the pipe, the filter fabric, and the outlet all have to be installed during construction. This is why we always plan drainage first. Planning early saves homeowners from expensive repairs later.
The Main Parts of a Retaining Wall Drainage System
A retaining wall drainage system is made of a few key parts working together. Each part has a job, and skipping any of them weakens the whole system.
Gravel Backfill Behind the Wall
Gravel backfill is the layer of stone placed directly behind the wall. It lets water drain down quickly instead of soaking into the soil. Most installations use crushed stone backfill or a clean drainage aggregate, usually about 12 inches deep behind the wall. Crushed stone works better than rounded gravel because it locks together and stays stable. Sand and dirt should never be used as backfill.
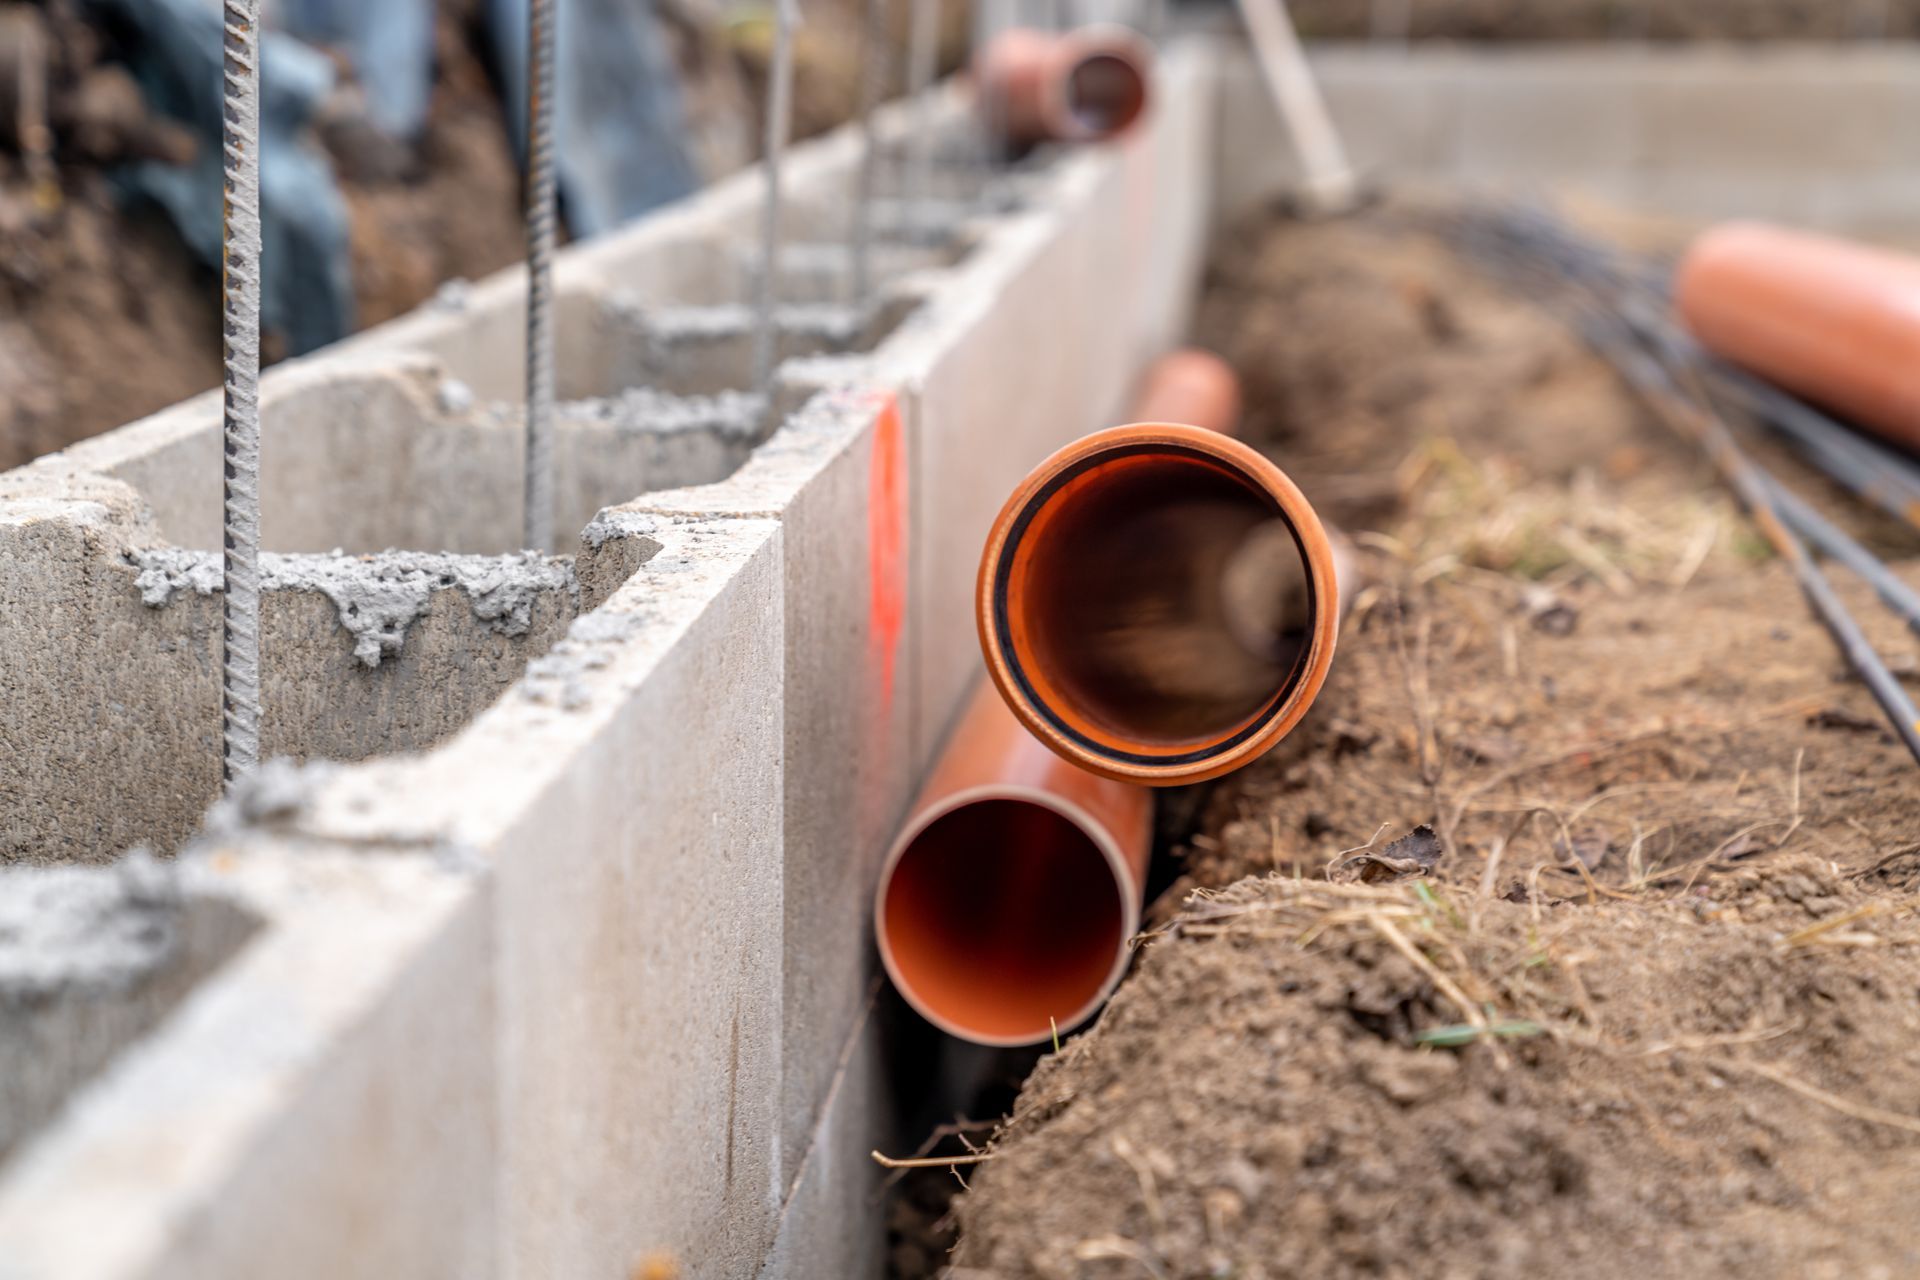
Perforated Drain Pipe at the Base
At the bottom of the gravel backfill, we install a perforated drainage pipe. This drain pipe collects the water that drains down through the gravel and carries it away from the wall.
The pipe is usually 4 inches wide and runs the full length of the wall. It must slope slightly so water flows out, not pool inside it. We always make sure the pipe daylights, meaning it ends at an open spot where water can safely exit, often connected to a French drain or a slope below the wall.
Weep Holes for Water Release
Weep holes are small openings built into the face of the wall. They let water that collects behind the wall escape out the front. Retaining wall weep holes are common in concrete and masonry walls. They are not always needed if a drain pipe is properly installed, but they add a backup path for water on taller walls or walls in heavy rainfall areas.
Filter Fabric to Prevent Clogs
Geotextile fabric, also called filter fabric, wraps around the gravel and the drain pipe. It lets water pass through but blocks soil from washing into the gravel. Without filter fabric, soil eventually clogs the gravel and the pipe. Filter fabric is cheap, but it doubles the lifespan of the drainage system.
What Affects Your Retaining Wall Drainage Needs
Not every wall needs the same drainage setup. The right plan depends on the conditions of your specific yard.
Soil Type and Water Retention
Soil type matters more than most homeowners realize. Sandy soil drains fast. Clay soil holds water for a long time and creates more pressure on the wall. If you have clay soil, you need stronger drainage. That means more gravel, a larger drain pipe, and sometimes a second drain line higher up in the backfill. Clay soil drainage is one of the most common reasons walls fail in the Northeast and Midwest.
Wall Height and Structural Pressure
Taller walls hold back more soil and face more water. A 2-foot garden wall has very different needs than a 6-foot wall supporting a driveway. Walls over 4 feet usually need engineering, reinforcement, and sometimes geogrid layers built into the soil behind them.
Slope, Grading, and Surface Runoff
The slope of your yard affects how much surface water reaches the wall. A wall at the bottom of a hill receives runoff from the entire slope above it. Proper grading sends water away from the wall, not toward it. The ground at the top of the wall should slope away from it for at least a few feet.
Nearby Patios, Driveways, Rooflines, and Irrigation
Water sources near the wall make a big difference. Before building, we look at where every drop of water is coming from. The most common culprits are:
- Downspouts that empty near the wall or drain toward it
- Patios and driveways that slope toward the wall instead of away
- Irrigation heads spraying within a few feet of the wall
- Pool or hot tub overflow lines
- Sump pump discharge points
- Roof valleys that dump heavy water onto the soil above the wall
Sometimes the fix is as simple as moving a downspout or adjusting a sprinkler head. Small changes here protect the wall for years.
Common Retaining Wall Drainage Mistakes Homeowners Should Avoid
We have repaired walls that failed for the same handful of reasons over and over. The most common drainage mistakes we see are:
- Backfilling with native soil instead of clean crushed stone
- Skipping the perforated drain pipe entirely
- Installing a drain pipe with no clear outlet
- Forgetting filter fabric around the gravel and pipe
- Grading the ground at the top of the wall toward the wall instead of away
- Letting outlets and weep holes clog up over the years
Using the Wrong Backfill Material
The most common mistake is backfilling with the soil that came out of the hole. Native soil, especially clay, holds water and creates pressure. Proper backfill must be clean crushed stone or drainage aggregate.
Forgetting to Daylight the Drain Pipe
A drain pipe that does not have a clear outlet is just a buried tube full of water. The drain pipe must daylight at a spot lower than the wall base. If the yard does not allow that, the pipe should connect to a French drain, a dry well, or another drainage system that carries the water away.
Poor Grading Around the Wall
If the ground above the wall slopes toward it, water collects at the top and seeps straight down into the backfill. Grading should always pull water away from the top of the wall. This is one of the cheapest fixes and one of the most overlooked.
Ignoring Drainage Maintenance After Installation
Drainage systems need a quick check now and then. Leaves, mulch, and dirt can clog the outlet of a drain pipe or block weep holes. Once a year, we recommend walking the wall, checking the outlets, and making sure water is flowing freely. A clogged drainage system is one of the leading causes of failure on walls older than 10 years.
Retaining Wall Design Factors Beyond Drainage
Drainage is the most important part of wall design, but it is not the only part. A strong wall depends on the right materials, the right reinforcement, and the right permits.
Choosing the Right Wall Material
Common retaining wall materials include concrete block, natural stone, poured concrete, timber, and segmental retaining wall blocks. Segmental blocks are popular for residential walls because they are strong, look good, and handle drainage well. Timber walls are cheaper but have shorter lifespans. Poured concrete is the strongest but costs more. The right choice depends on the height, the load, and the look you want.
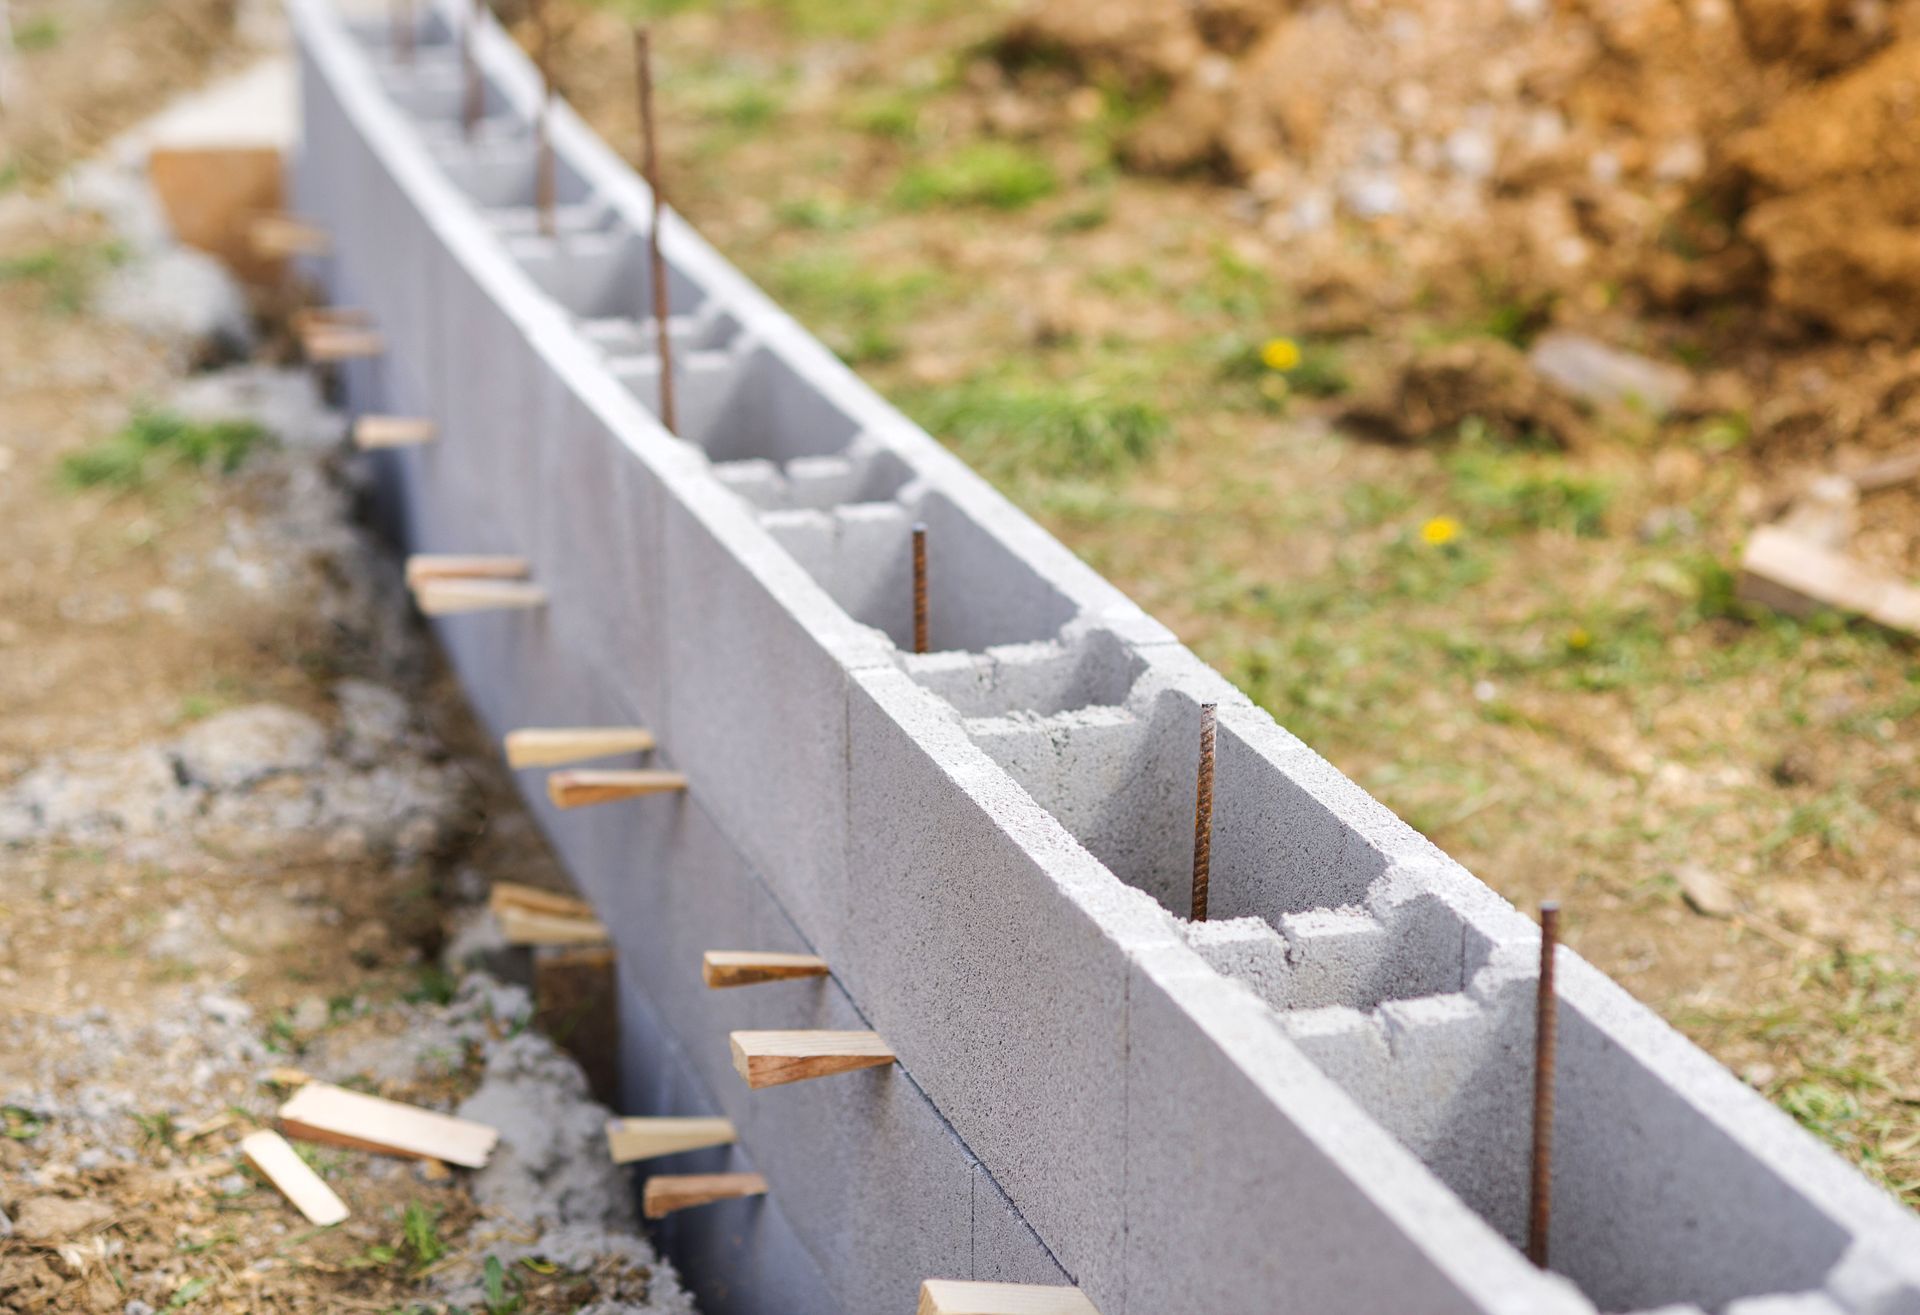
Reinforcement for Taller or Load-Bearing Walls
Walls taller than 4 feet, or any wall holding back a driveway or structure, usually need reinforcement. The most common method is geogrid, a strong plastic mesh laid in horizontal layers between the wall and the backfill. Geogrid ties the soil and the wall together, so they move as one unit. Without it, taller walls almost always tip forward over time.
Local Codes, Permits, and Engineering Requirements
Most towns require a permit for walls over a certain height, often 3 or 4 feet. Some require an engineered design stamped by a licensed engineer. Skipping permits causes problems when you sell your home or file an insurance claim. We always check local codes before starting and pull the proper permits.
Signs Your Retaining Wall May Have Drainage Problems
If you already have a wall, watching for early warning signs can save you a full rebuild. Most drainage problems show up before the wall fails completely. Walk your wall once or twice a year and look for these signs:
- Leaning, bowing, or bulging anywhere along the wall
- New or growing cracks running through blocks or concrete
- Gaps opening between sections that used to fit tight
- Water pooling at the base of the wall after rain
- Soil washing out from under the wall or through the joints
- Wet spots on the wall face that never seem to dry
- Mulch, plants, or grading shifting at the top of the wall
A wall that is starting to lean or bow is under pressure it cannot handle, and this is almost always a drainage issue. Cracks and gaps point to shifting soil and water pressure. Standing water at the base means the pipe is clogged, the outlet is blocked, or there is no drainage at all. Soil washing out from under the wall is a serious sign that the wall could fail soon. Catching any of these early often means you can repair the wall instead of replacing it.
How Professionals Plan Retaining Wall Drainage
A professional install starts long before the first block goes down. The planning process is what separates a wall that lasts 30 years from one that fails in 5.
Site Evaluation and Soil Review
We start by walking the site, checking the soil, looking at the slope, and finding every water source nearby. Soil tests show whether we are dealing with clay, loam, or sand. The results shape every choice we make after that.
Drainage Layout and Material Selection
Next, we design the drainage layout. This includes the size and location of the drain pipe, the depth and width of the gravel backfill, the placement of weep holes, and where the pipe will daylight. Material choices matter too. We pick a wall material that fits the soil, the height, and the load.
Long-Term Maintenance Planning
Before we leave a job, we walk the homeowner through the maintenance plan. We show them where the outlets are, how to spot a clog, and what to look for during the seasons. A drainage system is built to last, but it lasts longer when someone is paying attention.
Build a Retaining Wall That Lasts
Drainage, design, and installation are not separate steps. They depend on each other. A great design fails without good drainage. Good drainage fails without proper installation. Proper installation fails without the right design. The best walls come from teams that handle all three together. If you want to see what that looks like in finished form, our portfolio shows examples of completed retaining wall projects across a range of yards and conditions.
Drainage Components at a Glance
| Component | Purpose | Common Material |
|---|---|---|
| Gravel Backfill | Lets water drain down quickly behind the wall | Clean crushed stone, 12 inches deep |
| Perforated Drain Pipe | Collects and carries water away from the wall base | 4-inch PVC or corrugated pipe |
| Weep Holes | Allow trapped water to escape through the wall face | Built into masonry or concrete walls |
| Filter Fabric | Stops soil from clogging the gravel and pipe | Geotextile fabric wrapped around gravel |
| Drainage Outlet | Releases collected water to a safe exit point | Daylighted pipe end or French drain |
A retaining wall built with the right drainage system is one of the most reliable parts of a landscape. The work happens behind the scenes, but it shows up every year in the form of a wall that still stands straight, holds firm, and protects your yard the way it was designed to.
Plan Your Retaining Wall the Right Way
A retaining wall is too important to leave to guesswork. The difference between a wall that lasts decades and one that fails in a few years almost always comes down to drainage, design, and the team that installs it.
If you are thinking about building a new wall, replacing one that is showing signs of trouble, or just want a straight answer about whether your current setup is working, we are here to help. Our team will walk your property, look at the soil, the slope, and the water sources around the site, and give you an honest plan based on what we see.
Contact us today to schedule a consultation, or take a look at our
retaining wall services to learn more about how we approach every project from the ground up.
Frequently Asked Questions
How much does it cost to add proper drainage to a retaining wall?
Drainage adds a small fraction to the total cost of a wall, usually between 5 and 15 percent of the project. Crushed stone, perforated pipe, and filter fabric are all low-cost items. Most of the cost is labor and the time it takes to install everything correctly. Compared to the price of rebuilding a failed wall, drainage is the cheapest insurance you can buy.
My retaining wall does not have a drainage system. Do I need to tear it down?
Not always. If the wall is still straight and shows no signs of movement, you can often improve drainage from the outside. Regrading the top, adding a French drain a few feet behind the wall, redirecting downspouts, and adjusting irrigation can all reduce pressure on the wall. These steps will not match a properly built drainage system, but they buy time and often prevent failure on lower walls.
Can I install retaining wall drainage myself?
For walls under 3 feet in good soil, a careful homeowner can install drainage with the right materials and time. The work is straightforward but unforgiving. One missed step, like skipping filter fabric or burying a pipe with no outlet, undoes the whole system. For walls over 3 feet, walls holding back driveways, or walls in clay soil, hiring a professional is the safer choice.
Will good drainage help my retaining wall last through winter freeze and thaw cycles?
Yes, and this is one of the biggest reasons drainage matters in colder regions. Water trapped behind a wall freezes and expands, pushing on the wall every winter. Over years, this freeze and thaw cycle cracks blocks, separates joints, and tilts the wall forward. A working drainage system pulls water out before it can freeze, which is why properly drained walls last decades longer in places with hard winters.
How long should a retaining wall last with proper drainage?
A well-built segmental block or natural stone wall with proper drainage typically lasts 50 to 100 years. Poured concrete walls can last even longer. Timber walls usually max out around 20 years no matter what, because the wood eventually rots. Without drainage, those numbers drop sharply. We have seen walls fail in under 10 years from drainage problems alone.
Recent Posts